
Amtico Spacia Rialto Concrete LVT Installation in Battersea SW11
We’ll be honest with you—we don’t fit Amtico LVT flooring as often as we once did. Over the past couple of years, the gap between premium brands like Amtico and Karndean and their more affordable competitors has narrowed substantially. Manufacturers such as J2 Flooring, Forbo, and Paragon now offer similar quality flooring with equally impressive designs for considerably less money. For many of our clients, that value proposition simply makes more sense.
That said, when a customer specifically requests Amtico, it’s always something of a nostalgic pleasure for our team. As experienced Amtico Battersea fitters, we’ve installed literally hundreds of Amtico LVT floors across the commons of Battersea SW11 over the years. So when this particular project came through, we were delighted to revisit a brand that has served so many of our customers well.
The Product: Amtico Spacia Rialto Concrete
The client selected Rialto Concrete from the Amtico Spacia Collection—a beautifully designed LVT that captures the contemporary appeal of polished concrete flooring without the cold, hard reality of actual concrete underfoot. The tiles measure 457.2 x 457.2 mm, creating that classic square tile aesthetic that works brilliantly in modern kitchens and open-plan living spaces.
What makes this particular design so effective is its subtle variation in tone and texture. Unlike a uniform grey, the Rialto Concrete features gentle mottling and natural-looking imperfections that give it genuine character. When you’re looking at LVT floors London homeowners tend to favour, concrete-effect tiles consistently rank among the most popular choices—and it’s easy to see why when you look at the finished results here.
The Challenge: Preparing an Epoxy-Painted Subfloor
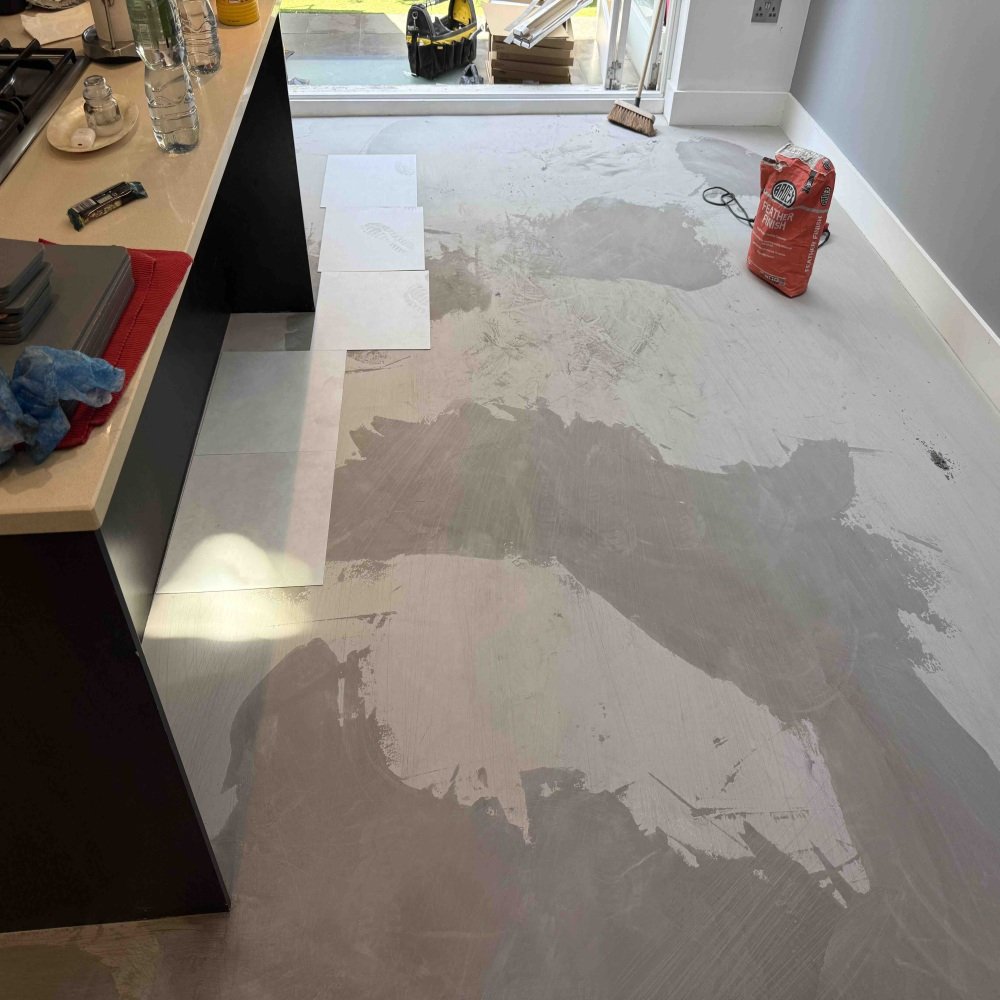
Every professional flooring installation begins with proper subfloor preparation, and this project presented its own particular challenge. The existing subfloor had been coated with epoxy floor paint—a tough, resilient surface that’s excellent for many applications but problematic when you need to bond new flooring materials to it.
The issue with epoxy paint is that it creates a sealed, non-porous surface. Primers and screeds need something to grip onto, and a glossy painted floor simply won’t provide adequate adhesion. Left untreated, this could lead to the screed failing over time, which would ultimately compromise the entire floor installation.
Step One: Coarse Sanding
Our approach began with coarse sanding across the entire subfloor. The primary goal here wasn’t necessarily to remove every trace of the epoxy paint—though in practice, much of it does come away during this process. Rather, we were focused on creating a key for the subsequent primer and screed layers. A keyed surface has sufficient texture and porosity to allow proper mechanical and chemical bonding with the products applied over it.
This is one of those aspects of floor installation that homeowners rarely see but which makes all the difference to the longevity of the finished floor. Our fitters assessed the surface on the day to determine exactly how much preparation was required—it’s simply not possible to make that call in advance without seeing how the existing paint responds to the sanding process.
Step Two: Priming and Screeding
With the subfloor properly keyed, we applied a specialist primer and allowed it to dry thoroughly. This primer creates a bridge between the original substrate and the levelling compound, ensuring everything bonds together as a unified system.
Next came the screed application. Self-levelling screed flows across the floor to create a smooth, flat surface free from undulations and imperfections. For LVT flooring—which is relatively thin and flexible—any bumps or dips in the subfloor will telegraph through to the finished surface. Getting this stage right is absolutely essential.
Step Three: Feather Finish
After the screed had cured, we applied a feather finish compound to address any remaining minor imperfections. This was then sanded smooth to create the perfect canvas for the Amtico tiles. You can see in our installation photographs the careful preparatory work that goes into every floor we lay—it’s this attention to detail that separates professional installation from a substandard finish.
Installing the Amtico Spacia Tiles
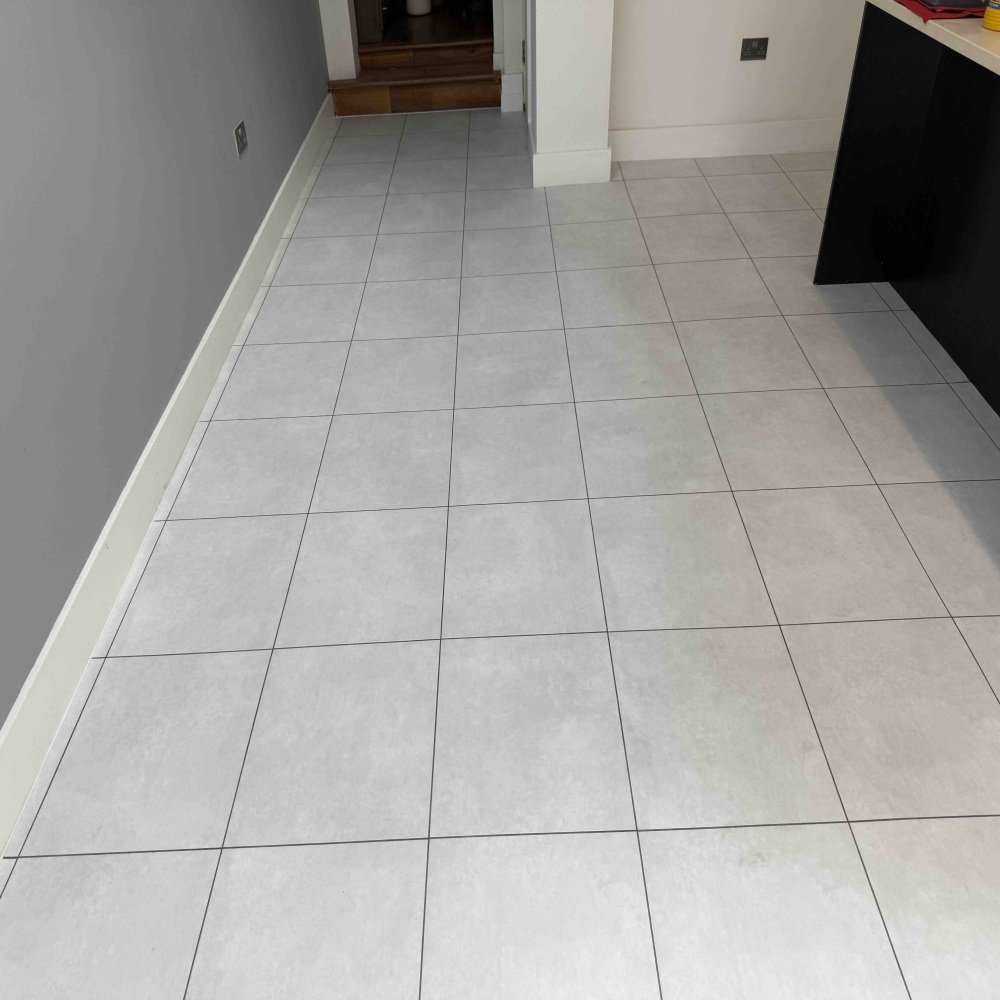
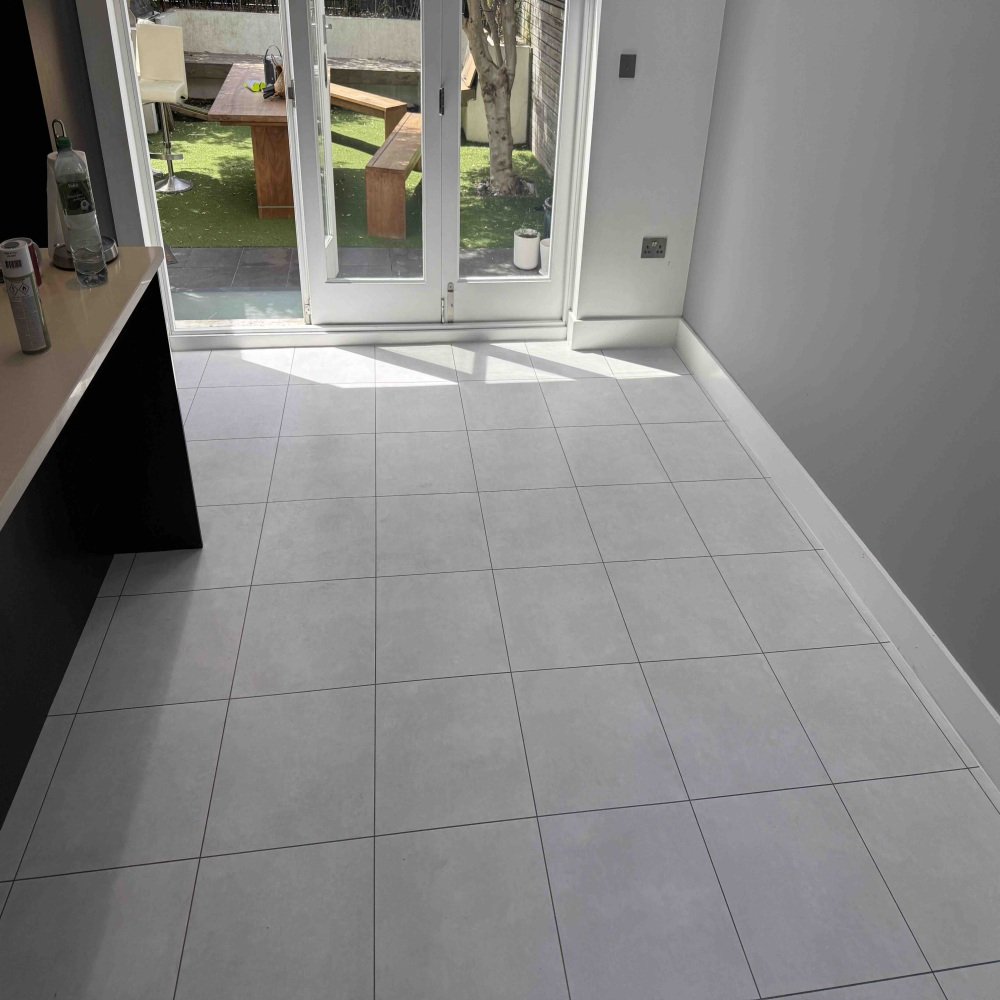
With subfloor preparation complete, the satisfying part of the job could begin. The Rialto Concrete tiles were carefully measured, cut to fit around kitchen units and doorways, and adhered to the subfloor using appropriate adhesive. The design strips between each tile create that authentic grouted tile appearance, adding to the realism of the concrete effect.
Working around a kitchen with fixed cabinetry requires precision cutting and careful planning to ensure the tile layout looks balanced and intentional. Our fitters took time to position the tiles so that cuts fell in logical places and the overall pattern worked harmoniously with the room’s dimensions.
Finishing Touches
As with all our installations, we eased any doors that required adjustment to accommodate the new floor height—a small detail that makes a significant difference to how the room functions day-to-day. The site was thoroughly cleaned and cleared upon completion, leaving our client with a stunning new floor ready to enjoy.
The Results Speak for Themselves
Looking at the finished photographs, this really was a beautiful piece of work. The Rialto Concrete tiles complement the dark wood-effect kitchen cabinetry perfectly, creating a contemporary aesthetic that feels both warm and sophisticated. The consistent grout lines between tiles demonstrate the precision of the installation, while the subtle variation in the concrete effect adds visual interest without overwhelming the space.
This project reminded us why Amtico built such a strong reputation in the first place. While we may recommend more cost-effective alternatives for many projects these days, there’s still something special about working with a product that has such a heritage of quality. For clients who want that premium brand assurance, Amtico remains an excellent choice—and with our experience across Battersea and South West London, we’re well placed to deliver installations that do these products justice.
 |
 |
 |
 |
 |
 |
 |
 |
 |
 |


Recent Comments